Managing Reply Templates
Use
You use this procedure to create, modify, and delete reply templates that are saved in template folders. The templates can be used for example as automatic greetings or email signatures. You can use reserved words (variables) in the templates. The reserved words used in scripts are explained in Creating Scripts.
Reply templates can be used in chats and emails. Note that some reserved words (variables) can be used only in chats, some in emails. It is recommended to define different templates for emails and chats. If you add HTML content to a template, it must be pure HTML5.
To use reply templates of a template folder, agents need rights to view the template folder.
Prerequisites
-
You must have rights to manage reply template folders.
-
You must have rights to view queues.
Creating Reply Templates
-
On the System Configurator main screen, choose .
-
Choose Add New.
-
Choose Reply Template and click OK.
-
In the Basics block, do the following:
-
Enter a name for the template.
-
Enter description. This field is optional.
-
Select the language used in template. This field is mandatory.
-
Choose which content type the template has.
For information about how to create interactive templates for chat queues, see Interactive Templates.
-
Enter the subject.
To add the reserved words (or variables), choose the edit icon. To use values retrieved from the database, see below. If you just enter text for the subject, it replaces the original subject when the template is used in answering emails.
-
Enter the body text.
-
If you want to add an image to the body text, use CID in front of the image file name ( <IMG SRC="CID:[file name]">). Here is an example:
<IMG SRC="CID:companylogo.png">
The supported file formats are PNG, JPG, GIF and BMP. Then add the file as an attachment to the Template Attachments block.
- You can add so called reserved words (or variables) to body text, with them
information such as your name, case ID, and customer name can be added to the
template automatically.The table below lists and describes the reserved words (variables) you can use for the subject field and the body text.Note: In Communication Panel, you can use only the following:
- {SUBJECT}
- {CASEID}
- {STARTTIME}
- {CUSTOMERNAME}
- {CUSTOMERFIRSTNAME}
- {CUSTOMERLASTNAME}
- {USERFIRSTNAME}
- {USERLASTNAME}
- {USERNAME}
- {USEREMAIL}
- {USERPHONE}
- {AGENTCHATNAME}
Table 1. Available Reserved Words for E-Mails and Chat Where-Used
Reserved Word
Description
- Email subject
- Email body text
{SUBJECT} Displays the original subject of the e-mail.
Note: If you define a subject field entry in the email template without the{SUBJECT} variable, it will replace the original subject when that template is used.- Email subject
- Email body text
{CASEID} Displays the ID of the email
Note the following: CASEID is a numeric ID which is used in Communication Panel as email ID (seen in conversation details only). This ID can be used for searching the whole email conversation and should not be confused with CID which is a technical ID used for the preferred agent feature.
- Email subject
- Email body text
{RESPONSIBLE}
Displays the full name of the agent who accepted the e-mail
- Email subject
- Email body text
- Chat conversation
{STARTTIME} Displays the local time when the conversation was created
- Email subject
- Email body text
{ENDTIME}
Displays the local time when the e-mail was handled
- Email subject
- Email body text
{WARNINGTIME}
Displays the warning time defined for the e-mail
Chat conversation
{CUSTOMERCOMPANY}*
Displays the customer’s company name
Chat conversation
{CUSTOMERMOBILE}*
Displays the customer’s mobile number
- Chat conversation
- Email body text
{CUSTOMERNAME} * Displays the customer’s name
For social chats, this is the customer's display name.
For emails, this is based on a directory entry.
- Chat conversation
- Email body text
{CUSTOMERFIRSTNAME}* Displays the customer’s first name For emails, this is based on a directory entry.
- Chat conversation
- Email body text
{CUSTOMERLASTNAME}* Displays the customer’s last name For emails, this is based on a directory entry.
Chat conversation
{CUSTOMERPHONE}*
Displays the customer’s phone number
- Chat conversation
- Email body text
{CUSTOMEREMAIL}*
Displays the e-mail address from which the e-mail or chat has been sent
- Chat conversation
- Email body text
{USEREMAIL} Displays the e-mail of the agent who replies to the e-mail or chat
- Chat conversation
- Email body text
{USERFIRSTNAME} Displays the first name of the agent who replies to the e-mail or chat
- Chat conversation
- Email body text
{USERLASTNAME} Displays the last name of the agent who replies to the e-mail or chat
- Chat conversation
- Email body text
{USERMOBILE}
Displays the mobile phone number of the agent who replies to the e-mail or chat
- Chat conversation
- Email body text
{USERNAME} Displays the full name of the agent who replies to the e-mail or chat
- Chat conversation
- Email body text
{USERPHONE} Displays the extension number of the agent who replies to the e-mail or chat
Chat conversation {AGENTCHATNAME} Displays the agent's chat name defined in * = This information is only available if included in the customer chat form on the web site.
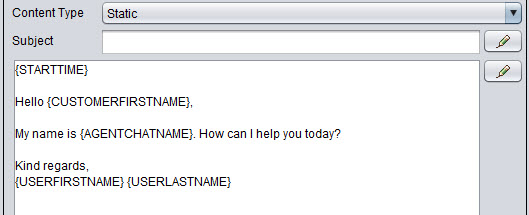
Figure 1. Text in Reply Template 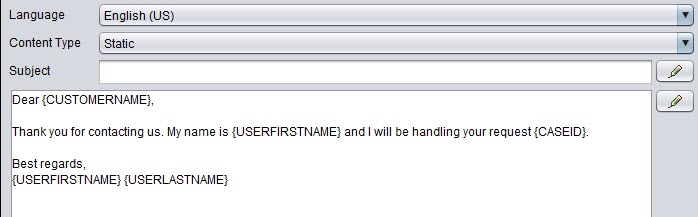
Figure 2. Text in End-User Application 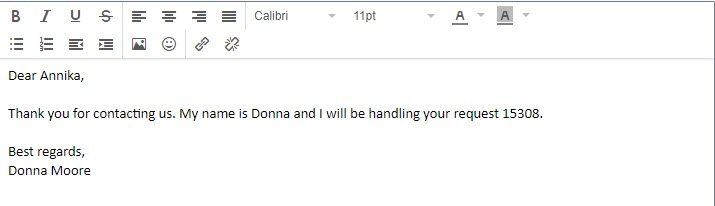
If the information is not available, the reserved word field is left empty in the end-user application and must be edited manually.
-
-
- To enable agents to search for this template in Communication Panel, add the template name or other descriptive term as a keyword in the block Keywords. Added in 1911.
-
If you want to include attachments in the template, add them in the Template Attachments block.
Note:In Communication Panel, attachments are supported only for emails. If a template with attachments is used for chats, the attachments are removed and only the body text is used. For WhatsApp templates, see Using WhatsApp Message Templates.
-
In the Template Folders block, add the folders in which the template is available.
This is mandatory since reply templates must be linked to a folder.
-
Save your entries.
Creating Signature Templates for Emails
- On the System Configurator main screen, choose .
- Choose Add New.
- Choose Reply Template and click OK.
- In the Basics block, do the following:
- Enter a name for the template.
- Enter description. This field is optional.
- Select the language used in template. This field is mandatory.
- Choose Static as the content type.
- Enter a subject or use reserved words if needed.
- Enter the signature body text and reserved words. For supported reserved words,
see the table
Available Reserved Words for E-Mails and Chat
.If you want to add an image to the body text, use CID in front of the image file name ( <IMG SRC="CID:[file name]">). You can also specify the width for the image. Here is an example:
<IMG width="160" SRC="CID:companylogo.png">
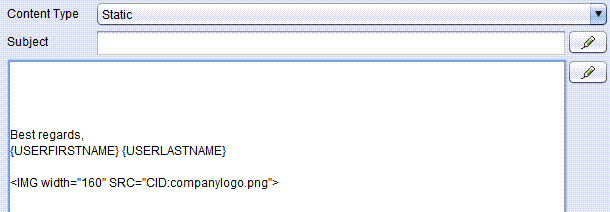
The supported file formats are PNG, JPG, GIF and BMP.
Add the image file as an attachment to the Template Attachments block.
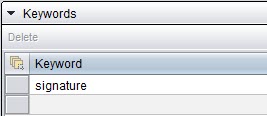
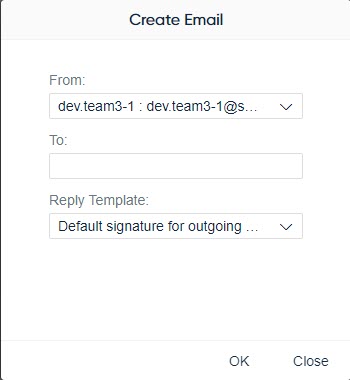
- To enable agents to use the signature template when creating outgoing emails in Communication Panel, enter
signature as a keyword. If this is missing, the template isn't available for
the Create Emailfunction.
- If you added an image to the body text, add it also as an attachment in the Template Attachments block.
- In Template Folders, add the folder where you store signature templates.
- Save your entries.
- Go to and choose the queue where you want the signature template to be available.
- In choose the template.
Although it's not mandatory to define a signature template for a queue as all templates that have the keyword signature are displayed when an agent starts creating a new outgoing email, it's convenient when the signature is automatically selected for the agent:
- Save your queue changes.
Creating Automatic Replies for Outgoing SMS and WhatsApp Messages
- On the System Configurator main screen, choose .
- Choose Add New.
- Choose Reply Template and click OK.
- In the Basics block, do the following:
- Enter a name for the template.
- Enter description. This field is optional.
- Select the language used in template. This field is mandatory.
- Choose the content type.
- Enter the text and use reserved words if needed.
For supported reserved words, see the table
Available Reserved Words for E-Mails and Chat
.
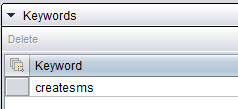
- To allow agents to see and use these templates when creating an outgoing message from
the create dialog in Communication Panel, enter createsms for SMS messages and createwa for WhatsApp messages as a
keyword. If the keyword is missing, the template isn't available from the
Create SMS and Create WhatsApp Message
functions.
- In Template Folders, add the folder where you store these outgoing message templates.
- Save your entries.
- Go to and choose the queue where you want the signature template to be available.
- In choose the template.
Although it's not mandatory to define a template for a queue as all templates that have the keyword createsms or createwa are displayed when an agent starts creating a new outgoing SMS or WhatsApp message, it's convenient when the template is automatically selected for the agent.
- Save your queue changes.
Modifying or Deleting Templates
-
On the System Configurator main screen, choose .
-
Search for the reply template you want to modify or delete.
The search result list appears.
-
Choose the reply template by double-clicking it.
-
Modify the template and save your entries, or choose Delete.