Creating user accounts in Sinch Contact Pro
Make sure you create users and user groups within the All Users group or one of its subgroups. Otherwise, you won’t be able to manage them properly.
Adding an extension number is required even for agents that only use chat or other messaging services. Plan the numbers with the help of the Number Viewer. Open it with a button in the upper right corner of the user account view or choose .
Copying users
-
On the System Configurator main screen, choose and click Search.
-
Select the sample user, for example to create an agent, select Sample Agent1.
For other user roles, select Sample Superuser or Sample Supervisor1, or one of the users you have created.
-
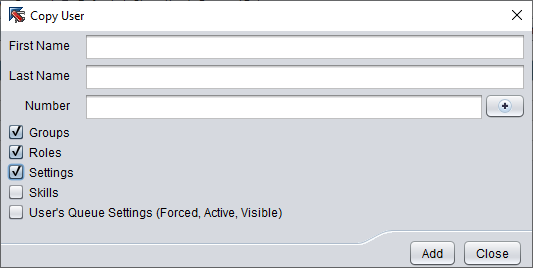
Click Copy and:
-
Enter the First Name and Last Name.
-
Enter the Number.
-
Select options Roles (this adds the role CC Agent to the user) and Settings (this applies the settings template Communication Panel Agent to the user).
-
-
Click Add
-
The user configuration view appears. Define other required settings. If you are copying a sample user that is not located in your group, remember to add the user to a subgroup of All Users in the Groups panel.
Creating users manually
-
On the System Configurator main screen, choose and click Add New. The user configuration view appears.
- Enter the First Name and Last Name, Number, and other basic information as needed. You find free numbers in the Number Viewer in the upper part of the user interface.
- In the User Settings Template field, select the template. For example, for agents use Communication Panel Agent. The template provides the required contact settings.
- Add a user group with a suitable role in the Groups block. Note:It is recommended not to select the role directly in the Roles block.
- Click Save and Close.