Configuring Queue's Contact Management Settings
You must have rights to modify queues or to create queues. In Opt-In IVR Settings, you must have at least viewing rights for custom IVRs to be able to select the Opt-In IVR Number.
You use this procedure to configure settings related to calls, e-mails, and chat requests.
- On the System Configurator main screen, choose .
- Search for the queue whose settings you want to configure.
The search result list appears.
- Choose the queue by double-clicking it.
- Choose Contact Management.
- Configure the settings according to the following tables.
The settings that are marked with an asterisk (*) are typically defined for the channel, see Configuring Channel Settings. An empty field or the option Not Defined here in the queue settings means that it follows the channel setting. If you define the value here for a queue, it overwrites the channel setting for that specific queue.
Technical Names may be required when importing or exporting configuration.
Table 1. General Contact Management Settings for Queues Queue Type
Field and Technical Name
Function
Phone, e-mail, and chat
Priority
In earlier versions, this field was called Target Answering Time.
Priority
Enter a value that defines how quickly the contact should be answered in regards to other contacts (the lowest value has the highest priority).
For example, queue A has the priority value 5 and queue B has the value 10. The calls from queue A are allocated first.
You can also adjust the priority of a contact at the channel level with the setting Importance of Contact Waiting Time.
For more information, see Priority.
Phone, e-mail, and chat
Queue Size
QueueLength
Enter the number of inbound contacts allowed in this queue. 0, or a negative value, means that the number of contacts is not limited. The default value is -1, the size is not limited.
Note:Contacts that are being allocated to agents are not counted to the queue size. For example, if the queue size is configured to be 3 and there are already 3 contacts being allocated to agents, a new contact is allowed to enter the queue.
The background color in the queue list in the end-user application changes according to the defined static queue capacity:
-
Green
There is at least one contact in the queue.
-
Yellow
Over half of the queue capacity has been used.
-
Red
The queue is full.
Phone, e-mail, and chat
Timeout for Contacts to be Picked or Rejected *
MaxPickTimeout
Enter a time to define how long a conversation is being offered in Communication Panel or Communication Desktop (CDT). The default value is 120000 (2 minutes).
The queue-level value must be less than the one defined for the channel.
Automatic Not Ready Status in Communication Panel
To change the agent status to not ready when the defined time has elapsed if the agent hasn't responded to the offering with the Accept or Reject buttons, define the following settings:- Timeout for Contacts to be Picked or Rejected in
- Activate Not Ready After No Response in
- Number of Offerings Before Activing Not Ready in
Timeout in Communication Desktop (CDT)
If you define timeout for contacts also in , CDT follows the user setting. For example, if Timeout for Contacts to be Picked or Rejected is 2 minutes and Answer Timeout for Queue Contacts 30 seconds, CDT rejects a queue contact after 30 seconds. CEM stops allocating it after 2 minutes.
Phone
Early Queuing
EarlyQueuing
To activate early queuing in this queue, select this option. The function must be enabled in advanced signaling settings in .
Phone, e-mail, and chat
Clear Old Skills
ClearOldSkills
Select this option if you want that the skill values are cleared if a call comes from another queue with required skills attached.
Phone, e-mail, and chat
Block Rejected Contact from Agent *
IfNoAnsAddToRejNbrs
Choose from the following options whether an auto-allocated queue contact can be re-allocated to the agent, who has rejected the contact or who did not pick it before either Timeout for Contacts to be Picked or Rejected or Answer Timeout for Queue Contacts expired. If a contact is forwarded into another queue, the contact can be allocated to the same agent again.
-
Yes: The contact is not offered to the same agent again from this queue.
-
Never: The contact can be offered to the same agent several times.
-
No Blocking if Contact Redirected after Max Waiting Time: Depends if the queue forwarding options Forward if All Agents Have Absence Profile or Are Logged Off from Queue or Forward if Allocating Is Not Possible Immediately is in use:
-
If one of the above mentioned queue forwarding options is not in use, behaves as Never.
-
If one of the above mentioned queue forwarding options is in use, behaves as Yes.
-
For e-mails you can only set the blocking on or off.
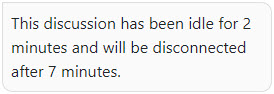
Chat Timeout for Idle Chats Enter a value to define how soon idle chats are removed. A chat is considered idle when there is no active text or video session in progress. The minimum value is 3 minutes and the maximum is 1 day. The default value is 10 minutes.Chat Warning Time for Idle Session Define a time after which a prompt message is sent to inform the customer that the chat has been idle and will be disconnected when the time you defined for Timeout for Idle Chats is reached. Use the prompt type Idle Session Warning Message and the variables Idle Session Duration and Warning Time for Disconnection. For more information, see Creating Prompts.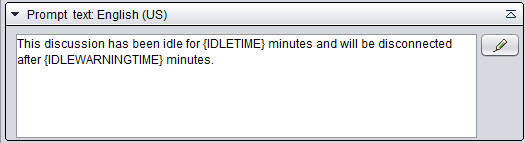
Chat
Busy During Wrap-Up *
BusyWhenWrapUp
Select this option if you want the a chat session in the wrap-up mode is considered as an active chat session and counted to the Maximum Number of Chat Sessions value defined in .
example:The setting Busy During Wrap-Up is enabled either at the channel or queue level. The Maximum Number of Chat Sessions value is 3, and an agent has two active chat sessions and one in the wrap-up mode. The agent is not offered a new chat request until the chat session in the wrap-up mode is handled.
This setting also applies to outbound chats. Note that this does not work with Universal Queue.
Phone
Number of Agents Affect Queue Size *
QueueLenSlope
Enter the value to define how the number of available agents affects the maximum size of the queue.
que len = max que len + (QueueLenSlope x available opers)
max que len means the queue size defined in the queue configuration.
The value for this setting can be one of the following:
-
x = 0 -> No effect (the configured static queue size).
-
x is greater than 0 -> More agents, longer queue.
-
x = 1 -> One additional agent means one more queue place.
-
x is smaller than 0 -> More agents, shorter queue.
The default value is 0.0.
E-mail
Allow Other Contacts When E-Mail Open
OverrideEmails
Select this option if you want that agents can receive other contacts although they have opened a queue e-mail.
To define if a user can receive other contacts when creating a new e-mail (that is not assigned to any queue yet), use Keep User Free When Writing New E-Mail for a user directly or via a user template, see Configuring Contact Settings.
If you route ECF tasks (type xri) to your system, select this option if you want to use multi-contact allocation. For user-related ECF task settings, see Configuring Contact Settings.
E-mail
Extra Data Included When E-Mail Allocated *
ExtraDataWhenAllocated
Enter a comma-separated list of field names (for example Language, Skills, or any custom key-value pair to define host application specific data added in the Task Management Interface, TMI) that are sent to the user interface when an e-mail is allocated to an agent. This setting is used with Embedded Communications Framework (ECF) and is also available in the channel view: .
Phone
Max. Waiting Time for Preferred Agent *
MaxPrefOperWait
Enter a value to define how long the software waits for the preferred agent to be available before the call can be allocated to another agent. This function works only in a call transfer during one call event.
For example, the preferred agent can be the last agent who answered the call. This is useful when a blind transfer fails and the call comes back to the queue. Then the software tries to reallocate the call to the same agent. In the hunt group mode, another agent is still able to take the call before this time has elapsed. The default value is 10000 milliseconds.
The preferred agent function is automatically enabled.
Phone
Reference Timestamp for Calculating Queuing Time *
QueUseEntryTime
Choose the timestamp to be used for calculating call priorities. The priority affects call allocation, see Allocation Priority Calculations. The default value is Call Enters Contact Center 1st Time.
-
Call Enters Contact Center 1st Time: Queuing time starts when the call enters the contact center application for the first time. The Welcome and Prewelcome messages are included. If the call is transferred from a queue or application to another (for example from the contact center to an IVR), the time is not reset.
-
CEM Receives Call Information: Queuing time starts when CEM Server gets the CALL_COMING message. If the call is transferred from a queue or application to another (for example from the contact center to an IVR), the time is not reset.
-
Call’s Last Entry to Contact Center: Queuing time starts when the call enters the contact center for the latest time. The Welcome and Prewelcome messages are included. If the call is transferred from a queue or application to another (for example from the contact center to an IVR), the time is reset.
-
Call Enters Queue: Queuing time starts when the call enters the current queue or application for the latest time. The Welcome and Prewelcome messages are not included.
Phone
Queues Used for Long-Term Waiting Time
QueLWTDDependencies
Enter a value to define what other queues are taken into account when the software uses the LEARNEDWAIT algorithm for calculating the estimated average waiting time in a queue (a so-called long-term average). In this case, the previous waiting times in the queue affect the calculation. Use this setting if you want that also the number of calls and agents in certain queues affect the calculation. Enter a comma-separated list of queues. We recommend that the maximum number of these queues is two.
Phone
Original Source Number Shown to External Agents and MTD Devices
ExtAgentShowCaller
Choose if the original call number is shown to external agents. The choice Not Defined means that this queue setting follows the voice channel setting. This is an operator-specific function and is supported by certain hardware only.
-
-
To define Recording-related contact settings, configure the
settings according to the following table.
Table 2. Recording Channel Type
Field
Function
Phone
Record Queue Calls
ServerRecording
Select this option if you want to activate recording of the queue calls.
Note: When queue calls are recorded, the recording continues even if the call is transferred to an external number.You can select this option at any time but if the system-wide recording mode is Disabled, no queue recordings are created.
Phone
Recording Behavior with Consents
Select how customer consents are used in recording:
-
Ignore Consents: Customer consents (the ones asked for a current call with an IVR, nor the ones saved in database earlier, or imported from an external system) do not affect recording. The default value.
-
Ask For and Follow Customer Consent: If customer consent is not found in database, it is asked with an IVR. Calls are recorded only if there is a customer consent to record the call.
Phone
Consent IVR Number
Select or enter either the built-in consent IVR number defined in (Consent IVR block) or the custom IVR number defined in IVR Management.
-
- To define Forwarding settings, configure the settings
according to the following table.
Table 3. Forwarding Settings for Queues Queue Type
Field
Function
Phone, e-mail, and chat
Extension for Default Queue
DefaultQueue
Choose the option for how contacts are handled if they cannot be answered, that is, when the situation defined in the Forwarding Options field has occurred, see below.
Contacts can be
-
Forwarded to voicemail (VOICEMAIL)
-
Disconnected (CALLDISCONNECT)
-
Disconnected and the busy sound played (CALLDISCONNECTBUSY)
-
Forwarded to some other queue extension. If you choose this, choose also the queue extension. If the extension is not defined, a call or a chat will be disconnected.
Note: If you have defined a voicemail number for the call queue but you leave the extension for default queue empty, calls are automatically forwarded to the voicemail after the maximum waiting time or the maximum queue size has been exceeded.Phone, e-mail, and chat
Max. Waiting Time
MaxWaitTimeInQueue
Enter the maximum time a contact is allowed to wait in a queue before it is forwarded to the next optional destination. The default value is 3 hours (= 180 minutes = 10 800 seconds). If the Extension for Default Queue value is not defined, the call or chat in queue is disconnected after this time. E-mails will stay in queue even though Extension for Default Queue is not defined.
For callback queues, it is recommended to define Max. Waiting Time value to be for example 24 hours (=1 440 minutes = 86 400 seconds). Once this time has elapsed, the callback request will be recreated to a queue by CEM Server (the counter starts from zero although recreated callback request keeps its position in a queue). The system default value Call Enters the Contact Center 1st Time for the setting Reference Timestamp for Calculating Queuing Time must be used for these queues in order for callback calls to preserve their position in the queue in case they are redialed. Redialing may occur for example due to the maximum waiting time of the callback queue being elapsed.
Phone, e-mail, and chat
Forwarding Options
QueueFullIfNoDest
The option Forward when Maximum Waiting Time Has Elapsed (MaxWaitingTime) is automatically chosen. The contact is forwarded to the default queue when the time entered in the Max. Waiting Time field has passed.
For calls and chats there are additionally options:
-
Forward if All Agents Have Absence Profile or Are Logged Off from Queue NoServingAgents: A contact is forwarded immediately if there are no agents serving in the queue (agents have an absence profile or there are no agents logged on to the queue).
-
Forward if Allocating Is Not Possible Immediately NoFreeAgents: A contact is forwarded immediately if there are no free agents available (agents have active contacts, they have an absence profile, or there are no agents logged on to the queue).
Note: If the Extension for Default Queue is not defined, a call or a chat will be disconnected when the selected option occurs.Phone
Forwarding Number When Service Closed
ForwardOnServiceClosed
Choose how calls are handled when the service is closed by choosing the edit icon. Make sure you configure this for the overflow queues, that is, the ones that are defined as Extension for Default Queue, and Routing to Closed Overflow Queue is allowed.
Calls can be
-
Forwarded to voicemail (VOICEMAIL)
-
Forwarded to some other queue number ([queue number])
-
Forwarded to an external number
-
Disconnected (CALLDISCONNECT)
-
Disconnected and the busy sound played (CALLDISCONNECTBUSY).
Phone
Routing to Closed Overflow Queue
LetScheduleClosed
Choose if a call can be forwarded to an overflow queue even if the overflow queue is closed according to its schedule. If you allow this, make sure that in the overflow queue there is something defined in the previous setting Forwarding Number When Service Closed.
The choice Not Defined means that this queue setting follows the voice channel setting.
Phone
DTMF Character for Forwarding *
LeaveVoiceMessageChar
Enter the DTMF character that allows a caller in a queue to enter to the voicemail service for leaving a message or to be forwarded in another predefined way. You must activate the setting Transfer to Voicemail if Queue Is Full (in ) to enable the forwarding to voicemail.
The default value is the pound (#) key.
Phone
Forwarding Number after DTMF Character
ForwardOnUserInput
Choose how calls are handled when the defined DTMF character (for example the # key) is pressed by choosing the edit icon. Calls can be
-
Forwarded to voicemail (VOICEMAIL)
-
Forwarded to some other queue number ([queue number])
-
Forwarded to an external number
-
Disconnected (CALLDISCONNECT)
-
Disconnected and the busy sound played (CALLDISCONNECTBUSY).
Phone, e-mail, and chat Forwarding Destination for Scheduled Queue Close ForwardOnServiceClosing
Enter a queue number or address where the contacts waiting in a queue are forwarded when the queue will be closed by a schedule. Forwarding to external numbers (such as mobile phone) is not supported. Waiting contacts can be moved from a queue to another also by executing a SQL procedure manually. For more information, see community post Moving queuing conversations from one queue to another
Phone
Callback Queue Number
QCBQueueNumber
Enter the number of the queue where the callback requests are handled. This number must already exist in the system.
Phone
Enable Instant Forwarding
ForwardEnabled
Select this option if you want that contacts are forwarded.
When you select this option, contacts are immediately forwarded.
Phone
Instant Forwarding Number
ForwardNumber
Enter a number (internal or external) to where calls are forwarded when you have selected the Enable Instant Forwarding option. Or, choose the edit icon to define the forwarding action. Calls can be
-
Forwarded to voicemail (VOICEMAIL)
-
Forwarded to some other queue number ([queue number])
-
Forwarded to an external number
-
Disconnected (CALLDISCONNECT)
-
Disconnected and the busy sound played (CALLDISCONNECTBUSY).
-
- To define transferring options on the queue level, configure the following
settings.
Table 4. Transfer Settings for Queues Queue Type
Field
Function
Phone
Enable Transfer-On-Hold When Busy *
HoldTransferWhenBusy
Choose whether an agent can receive another call immediately after transferring an active call to a mobile phone or to an external number. In a normal situation, no calls are offered to the agent when this type of a target number is busy. This option has effect only if the transfer-on-hold method is in use.
Phone
Timeout for Transfer-On-Hold *
HoldTransferTimeout
Enter the timeout for calls that are not answered. This is only useful if the transfer-on-hold method is in use. If the call is not answered within the defined time, the call is considered as failed and CEM informs the Communication Desktop (CDT) application that there was no answer. If the user wants to try the transfer again, the attempt must be repeated manually. The default value is 3600 seconds.
Phone
Enable Join Transfer *
UseJoinTransfer
For advanced use only. Choose whether an alternative call transfer method is in use. In this case, CEM keeps the original call to the first destination waiting and initiates a new call to the second destination. These two calls are not connected until the new call to the second destination is successfully connected.
Phone
Timeout for Join Transfer *
JoinTransferTimeout
For advanced use only. Enter the timeout for calls to be connected to an external number. See the Enable Join Transfer option. The default value is 30 seconds.
Phone
Enable Barring of Internal Transfers
UseInternalTransferBarring
By default, internal transfers are not barred in a location that is used as a barring group. To enable barring internal transfers as well, select this option.
-
To use Opt-In function in your system, configure the settings according to the
following table. Opt-In enables asking the customer for permission to make a survey with
the Survey IVR.
Table 5. Opt-In IVR Settings for Queues Queue Type
Field
Function
Phone
Activate Opt-In IVR
OptInActivate
To activate the Opt-in, select this option.
Phone
Opt-In IVR Number
OptInNumber
Choose the IVR number for the Opt-in IVR. The list consists of available custom-made IVR numbers that are defined in IVR Management.
- To define that contacts or agents on the same CEM have higher priority,
configure the settings according to the following table.
Table 6. Weight Value Settings Queue Type
Field
Function
Phone, e-mail, and chat
Importance of Contact When on Same CEM as Agent*
QuePriorityWeightLocalCall
Typically, this does not concern Sinch Contact Pro cloud.
Choose a value to define the importance of a contact when the contact is on the same CEM as an agent. The default value 1.00 which means that all contacts on different CEMs have the same priority. A bigger value than 1 means that the contact on the same CEM is more important.
Phone, e-mail, and chat
Importance of Agent When on Same CEM as Contact*
QuePriorityWeightLocalOper
Typically, this does not concern Sinch Contact Pro cloud.
Choose a value to define the importance of an agent when the agent is on the same CEM as a contact. The default value 1.00 which means that all agents on different CEMs have the same priority. A bigger value than 1 means that the agent on the same CEM is more important.
- Save your entries.